
How To Get Waves In Your Crown
Written By: Nick Wavy
Last Updated: May 2026
The hardest area to get waves is in your crown. It's easy to get waves on the top, sides, and maybe even the back— but the crown is what separates average waves from elite 360 waves.
If you dont have waves in your crown, there will be huge surface area of your head that doesnt have waves, which will make the rest of your pattern look below average. A connected crown connects the waves from your top, sides, and back.
In this guide, I'll break down the steps that I took to develop my crown, and how it took my 360 waves from average, to elite. Ill show you exactly how to brush your crown, how to remove forks from your waves becuase of your crown, and the brush routine you should follow to get deeper, connected 360 waves.
If you want to follow along visually, watch my full crown tutorial video below.
What is the crown?
The crown is the little bald spot on the top of your skull. This is where your hair starts to grow out from, usually in a swirl pattern. It's the easiest way to identify if your hair is starting to thin.
The crown is different from the rest of your hair because it grows outward in multiple directions. Unlike the top or sides, the crown acts as the center point for your entire wave pattern.
That means:
- Small mistakes become more noticeable in your crown
- Forks develop easier because the crown is connected to your sides, top, and back
- Less waves in your crown make your pattern look weak and undefined
- Inconsistent brushing strokes makes the crown look messy
Most wavers don’t spend enough time isolating their crown during sessions.
 A natural swirl crown. This is the most common crown pattern.
Step 1: Find Your Crown
Before you start your wave journey, you should locate your crown. This allows you to establish the proper brushing angles required to get perfect 360 waves.
Most wavers have one of these crown patterns:
- Swirl crown
- Beehive crown
- Double crown
Swirl Crown
Naturally, our crown grows in a swirl motion, meaning the easiest crown pattern to get is a swirl pattern.
Its easier to train our hair following its natural growth pattern, but because the crown is so tight, and each section of our crown needs to lay specifically, the only way to develop your swirl crown pattern is by mirror brushing. This allows you to brush each section of the crown precisely in the pattern it naturally flows.
Beehive Crown
A beehive pattern is where your crown is identified, and evenly seperated. Each side of the crown is symmetrical to the opposite side; the left side goes to the ear just like the right side, and the top goes straight forward while the back goes straight down.
This is usually the harder crown pattern to achieve because it's not necessarily natural. Our crown naturally swirls, so training our hair in a beehive motion takes more effort and precision.
Double Crown
A double crown is unique and much more challenging. Multiple crowns gives you the option to choose which crown you want to focus on as your main, but because of these options, you need to focus on laying your secondary crown as complimentary as possible to your main crown. This requires double the brushing, focus, and effort.
Once you identify your crown pattern, it's much easier to establish the correct brushing routine. It's much easier to build your wave pattern with solid brushing foundations, than to already have a wave pattern, and trying to accommodate your crown to your old pattern. Starting with good habits makes your wave journey much easier.
➡️Read this article to learn how to brush your 360 waves
Step 2: Focus on Crown Sessions
The crown needs special attention. The small surface area doesn't accommodate random brushing like the rest of your wave pattern.
My routine:
- Start my brush session with a 10-minute crown focused mirror session. I don't brush any other section of my hair; only my crown.
- Brush directly from the crown outward
- Spend 20 minutes brushing the rest of my waves
- Before I put my durag on, brush my crown for another 5-10 minutes.
- Put on my durag to save my progress
This helps train the connections of the crown properly instead of creating extra forks.
Pro Tip:
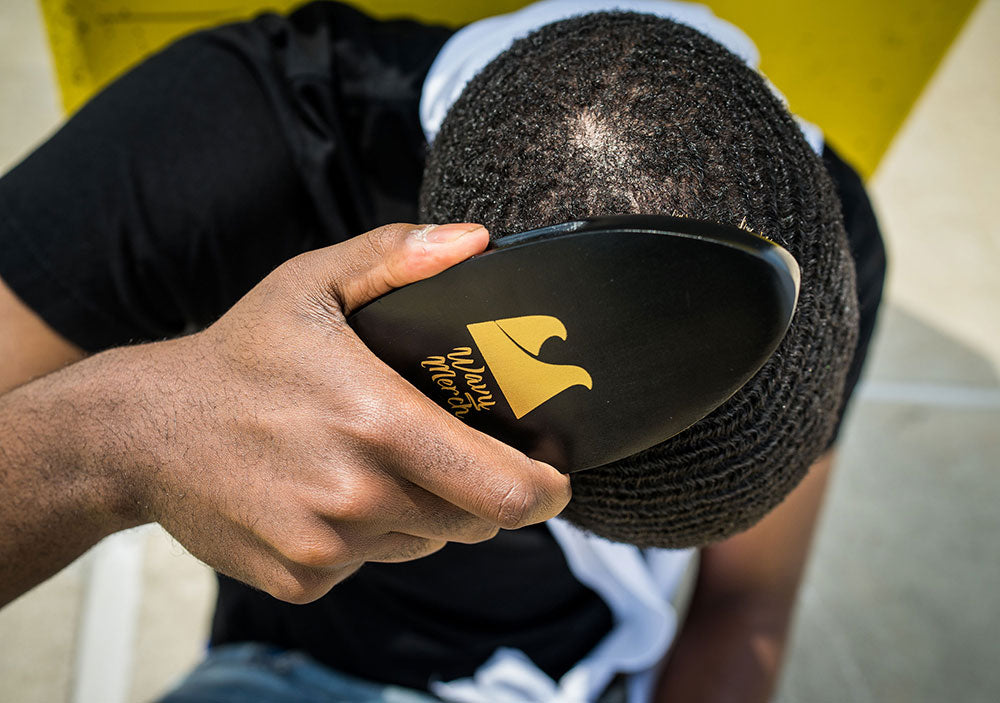
To help develop the crown in my 360 waves, I use the pointed of the Wavy Merch brush, and solely focus on the crown. The pointed tip ensures I can focus my brushing on the small surface area of the crown, developing the waves in the small hole of the crown.
 Yellow Thunder Hard Brush
Step 3: Use the Right Brush for Your Hair Stage
Different stages of your wave journey require different brushes.
Naturally, the hair in your crown is thinner than the rest of your hair, so choosing the right brush is very important.
During a Fresh Cut
On a fresh cut, it's best to use a soft brush on your crown. The soft boar bristles have enough pull to train the hair in your crown, and the texture of the bristles will also lay down your waves.
Not sure which brush to use? Our blog post will help guide you on the brush to use.
🔗Soft Brush vs Hard Brush For 360 Waves | Which one should you use?
My Recommendation:
🔗Inferno Soft Brush by Wavy Merch

Inferno Soft Brush
Perfect for finishing your brush session and laying your waves down without frizz
🔗Shop Here
During Wolfing
A hard brush will help pull the waves in your crown as your hair gets thicker with wolfing. The hair in the crown is thinner than the rest of your hair, so a firm medium brush would work best.
My Recommendation:
🔗Black Diamond Medium Curved Brush

Black Diamond Curved Medium Brush
Perfect for laying down thicker hair and everyday use
🔗Shop Here
Step 4: Laying down your crown
Your crown is a sensitive area; the hair is thinner and is susceptible to frizz. That's why compression and laying down your waves in the crown is extremely important.
After every brush session:
- Use The Laydown Glove to lay the hair down around the crown
- Tie your durag. This compresses your waves while saving your progress
 The Lay Down Glove
Lay your hair down after your brush sessions. No more plastic bag method.
🔗Shop Here
Wearing a durag helps your crown stay compressed, and prevents frizz from slowing down your progress.
Read this article to understand the importance of wearing a durag for 360 waves.
🔗Durags FAQ - Everything You Need To Know
My Durag Recommendation:

Silky Durag
The breathable material lays down your waves without cutting off circulation.
🔗Shop Here
Common Mistakes
- Random brushing. The crown is a small area and needs to be focused on. Have crown focused brush sessions where you specifically focus on brushing the crown.
- Ignoring the crown is the fastest way to ruin your overall wave progress. Your brush pattern should start from your crown. If you build your wave pattern from the crown, you wont need to shift your entire pattern once your waves have already been established.
- Using the wrong brush will slow down your progress. When your hair is short, use a softer brush, and as your hair gets thicker from wolfing, switch to a harder brush to pull the hair from the root.
- Blind brushing is the fastest way to develop a messy pattern. Using a hand mirror allows you to clearly see your pattern and crown.
- Cutting your crown too low is the fastest way to ruin your process. The hair is thinner in the crown, and cutting too low can take it below curl length. Always cut your crown a bit higher than the rest of your wave pattern.
Best Products for Crown Progress
The right products can help take the waves in your crown to the next level:
- Soft brush for when your hair is low
- Medium brush when your hair gets thicker
- Hand mirror to see exactly what you're brushing
- Wave cream to help lay down and moisturize the hair
- Durag to save your progress
FAQ Section
How long does it take to get waves in your crown?
If you dedicate 15-20 minutes a day focusing on brushing your crown, it could take you less than a week before you start seeing waves in your crown.
Why is my crown not connecting?
Your crown isn't connecting because you don't have a consistent brushing routine, or you simply aren't brushing enough. Set your angles, and brush your crown everyday.
What brush is best for crown work?
A soft brush works best for brushing your waves when your hair is short, and a medium brush works better when your wolfing.
Should I wolf to improve my crown?
Yes. Wolfing grows your hair out, and the longer your hair becomes, the curlier it becomes. Waves are laid down curls, and the hair in the crown is usually thinner than the rest of your hair.
How often should I brush my crown?
At least 15-20 minutes a day of dedicated crown brushing will help get waves faster in your crown.
My Final Thoughts
The crown is what separates elite waves from average waves.
The crown is the final piece to the puzzle in taking your waves to the next level.
Anyone can pick up a brush and get waves, but only a select few who take the craft very seriously can get waves in the crown. It takes significantly more effort getting waves in your crown than any other area of your head, and thats what separates a casual waver to an elite one.
Once you get your crown on point, your waves go from basic, to elite.
My final advice is to start focusing on your crown early on in your journey. If you start developing your wave pattern from your crown, it will be much easier to achieve elite waves, than having your pattern set, and then trying to get your crown waved up. A crown exposes your weaknesses, so if your crown is solid from the start, the rest of your waves will become elite in no time.
If you have trouble on getting waves on your sides, our blog post below will help you.
🔗How To Get Waves On The Sides
 Alaska Ice Medium Brush
Your waves in the crown will develop the more you brush. Greatness takes time.
🔗Shop Here


0 comments